
Table of Contents
ToggleBlue Tick on Instagram
Having a verified badge on Instagram might look cool, but it’s not just about showing off. Verified accounts are actually useful. They get more attention, help people find real news, and prevent fake accounts. When you’re verified, your account looks more trustworthy. So, let’s talk about what verification is, how to get that blue checkmark, tips to improve your chances, and some common questions about it.
Become an Instagram verified account in just a few steps.
Getting verified on Instagram is pretty easy. Just make sure you’re logged into the right account. For example, if you’re trying to verify your company’s account, don’t use your personal one. Anyone can apply to get verified on Instagram. Below are the steps you should take in order to enter the verification process for getting the blue checkmark next to your name on your Instagram profile.
Being notable is key for in-app verification. A verified badge is a checkmark that shows up next to an account’s name in search and on the profile. It means Instagram confirmed it’s the real deal for public figures, celebs, or big brands. The badge proves an account is real, not how important they are. Not everyone famous gets it though. So, your account should be about a well-known person, brand, or business.
Here’s how to ask for the badge:
Step 1: Log Into Your Account
Open the Instagram app on your phone and sign in to your account.
If you have more than one account, make sure you’re using the right one. Log in to the account you want the badge for.
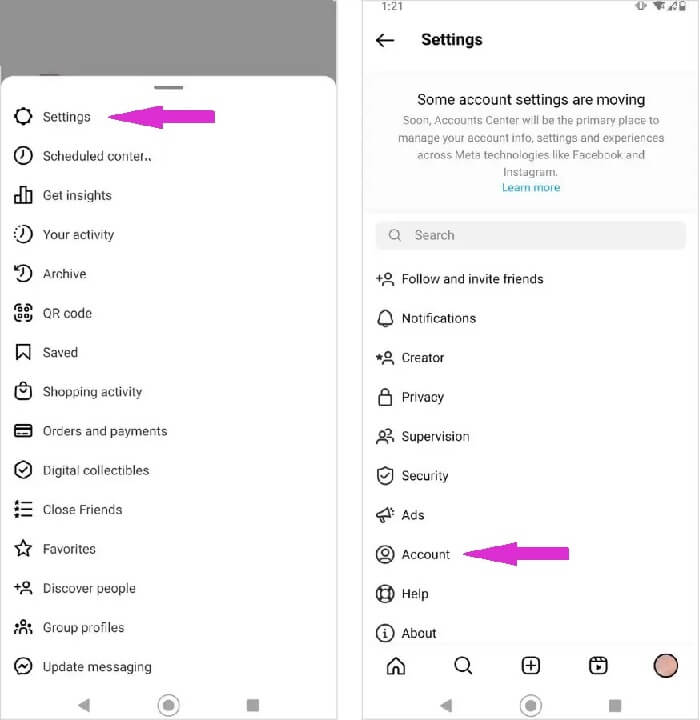
Go to Settings and tap on “Account”:
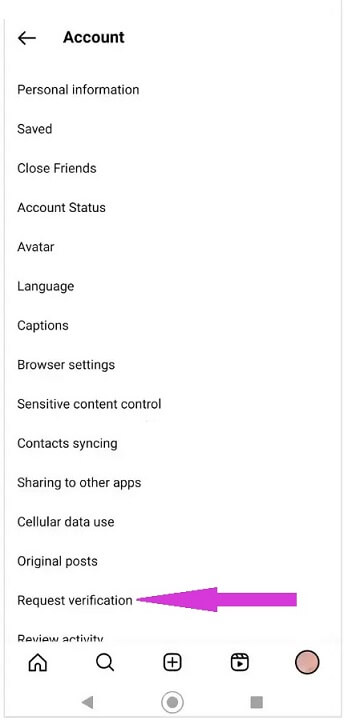
Step 2: Request Verification
When you’re on your Instagram profile, touch the Menu button at the top-right corner.
Then, tap the icon that looks like a tiny gear – that’s your Settings. Inside Settings, find and tap on “Account”.
Scroll down a bit, and you’ll see “Request Verification”. Just tap that, and you’ll find the form.
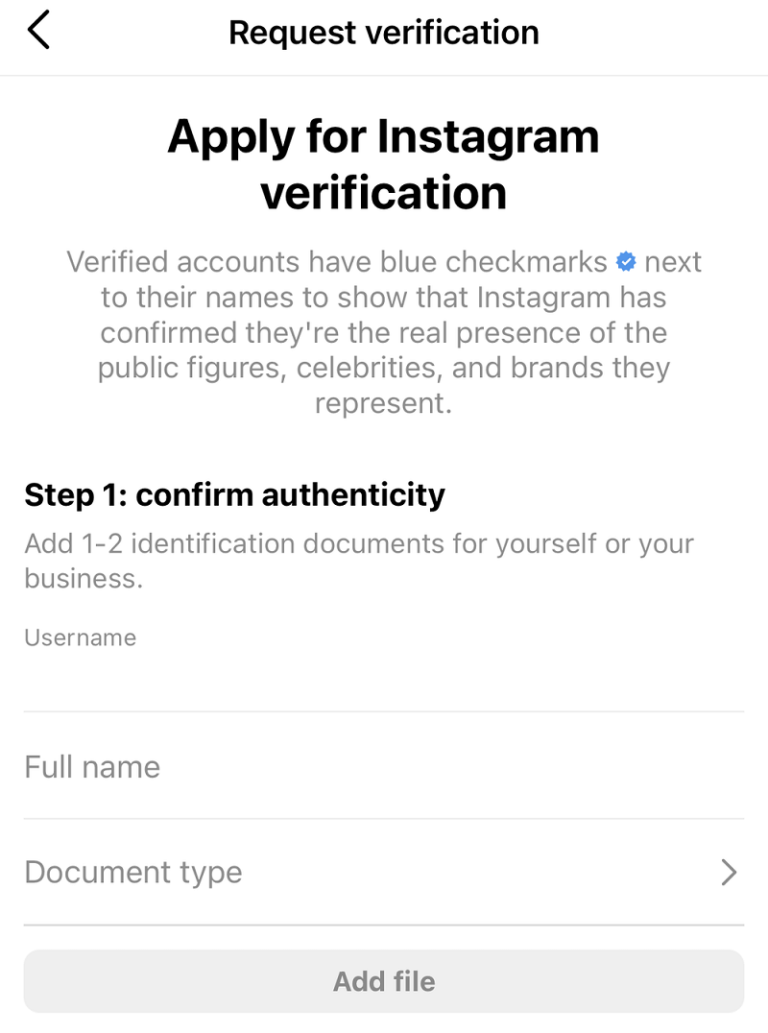
Step 3: Confirm Authenticity
Type in your username and your real, full name. Also, you need to attach a photo of a valid ID from the government – like a driver’s license or passport.
Make sure your full name matches exactly how it looks on your official ID.
After that, you’ll need to upload an official document. If you’re a person, use your passport, national ID, or driver’s license. For businesses, you can use a utility bill with your company’s name, articles of incorporation, or a tax return. Just make sure the name you entered earlier matches the name on your documents.
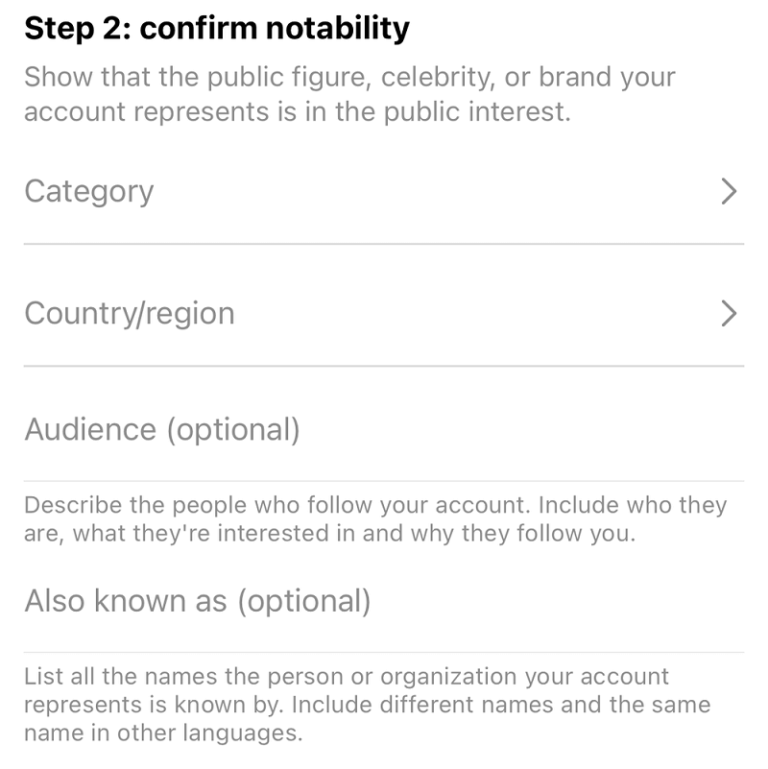
Step 4: Confirm Notability
Prove you’re well-known in a certain category and country. There are different types to choose from, so pick the one that fits your Instagram best. Types include: News or media, Sports, Music, Fashion, Entertainment, Online creator/blogger/influencer, Gamer, Global business/brand/organization, and Other.
This part shows that your account is about a public figure, famous person, or brand that matters.
Here’s what you do:
1. Choose a type – like News/Media, Sports, Music, etc.
2. Tell us the country where you’re most famous.
3. If you want, share more about your followers.
4. If there are other names people use for you, write those down too.
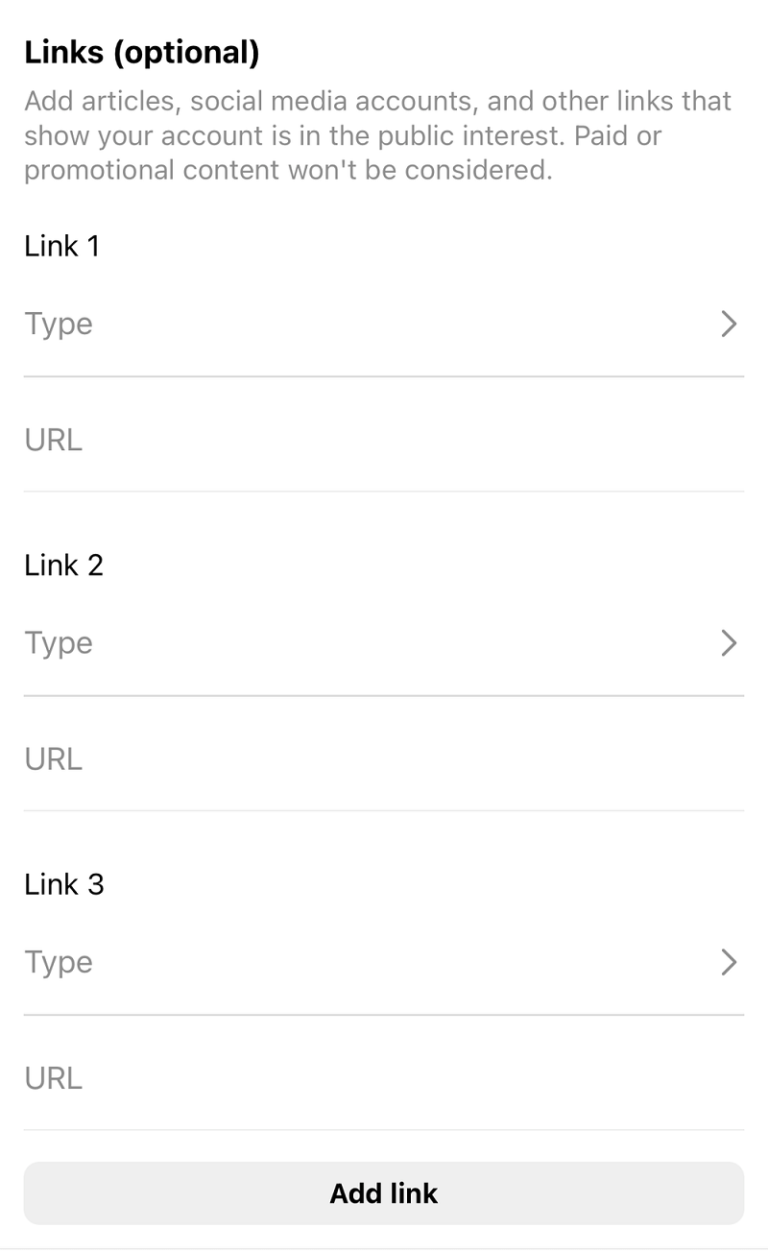
Step 5: Provide Links (optional) but recommended
Last step, you can include links to back up your application and show you’re famous. It’s technically not required, but it’s a smart move if you really want that blue checkmark.
Add links to articles or social media accounts that prove people care about your Instagram.
Choose carefully – go for well-known sources if you can. Remember, stuff you paid for or promoted won’t work here. So, no need to add that.
This is extra, but it really helps your Instagram verification request. You can put up to 5 links that show you’re known.
Instagram says to use news stories and other social media accounts. Just remember, anything you paid to show off won’t be counted.
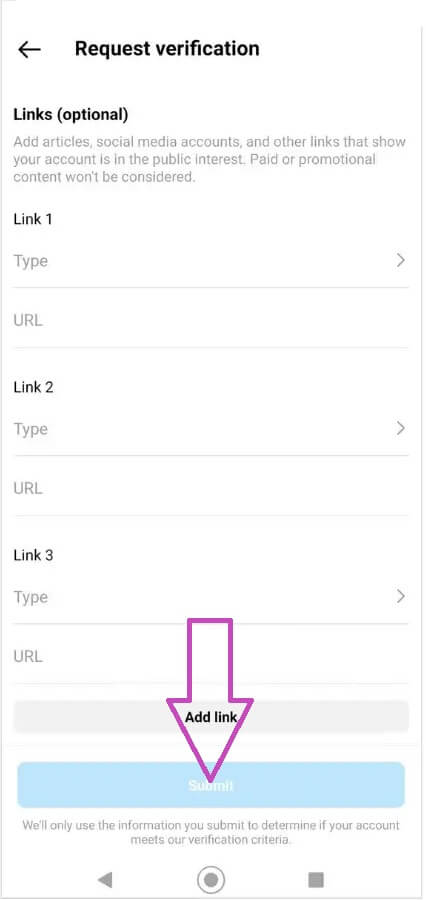
Step 6: Scroll down and tap "Submit":
Finally, tap the blue Submit button at the bottom of the screen to send your verification request to Instagram.
The information will be used by Instagram to determine if your account meets its verification criteria.
What Happens After Requesting Verification?
Instagram will tell you if your application worked in about a month. If it didn’t, don’t worry. You can try again in another 30 days. But, be patient – if you apply again too soon, they’ll cancel it all. So, take your time instead of rushing and losing your chance for that cool blue checkmark.
When Instagram looks at your request, they’ll send you an answer in a few days. If it’s a “yes,” great! If it’s a “no,” don’t give up right away.
There can be lots of reasons why Instagram says no to the blue checkmark. If they say no the first time, use that as a chance to improve your profile, get more followers, and show you’re important online.
Once you’ve made those changes, just try again. You can send in the next request 30 days after they said no the first time.
Keep in mind:
- Even if your account is eligible for verification, submitting a request doesn’t guarantee that your account will be verified.
- Submitting multiple verified badge requests doesn’t guarantee that your account will be verified and applying for a verified badge multiple times before receiving a decision will cancel your application.
- Once verified, you may not change the username on your account, and verification cannot be transferred to a different account.
- Verifying your account on Instagram will not verify your account on Facebook.
- If you receive a verified badge using false or misleading information during the verification process, we will remove your verified badge and may take additional action to disable your account.
Tips to Get Your Own Account Verified on Instagram
instagram blue tick,how to get blue tick on instagram,how to get verified on instagram 2023,how to get verified on instagram,get verified on instagram,instagram par blue tick kaise kharide,verification on instagram,blue tick on instagram,instagram verification,blue tick instagram,instagram,instagram verification process,blue tick,instagram verification badge,instagram verified,how to get blue tick,meta verified instagram,how to get verified on instagram,get verified on instagram,instagram verified,how to get verified on instagram without followers,meta verified instagram,verification on instagram,instagram verified badge,instagram verification,meta verified,how to get verified on instagram for free,instagram blue tick kaise lagaye
This website is not affiliated with the official app/website. The content provided is for educational purposes only. We do not support or endorse any illegal activities. If you are the owner of the app and have concerns about our promotion, please contact us. We assume no legal or financial responsibility for the application. Users should review the app’s privacy policy and terms of use before using it. We are not liable for any consequences resulting from the use of the app. This disclaimer is for informational purposes only and not legal or financial advice. Users should exercise caution and conduct their own research.